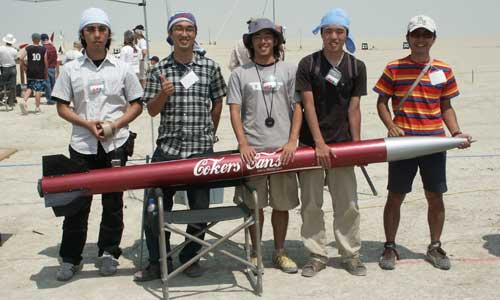
ARLISS 2000 (Coker's Cans)
Some members of AERO-PAC, organized by Tom Rouse, worked with Professor Bob Twiggs of Stanford to build rockets to launch student satellites from amateur rockets at the Black Rock Desert. For more information about the program, see the ARLISS web site.
The first ARLISS launch was held on September 11, 1999 after much planning. Two teams from Japan, a team from Arizona and a team from Redwood City, CA each built three "can sats" and the ARLISS team provided four rockets to launch them. I helped out here and there with construction, but mostly I took pictures. I participated as a flier in the second (2000), third (2001) and fourth (2002) years, with the rocket described here.
In 2002, the rocket was damaged on recovery of the second flight. It could probably have been fixed, but I decided to rebuild it since I also wanted to make some changes to the design to make it easier to prep. My new ARLISS rocket is the ARLISS 2004 or 3UP.
The Pictures
 |
 |
|
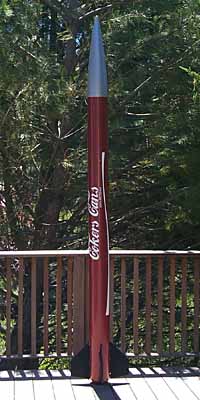
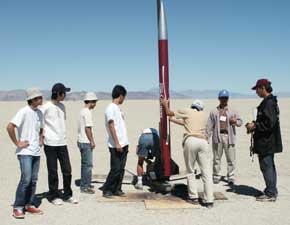
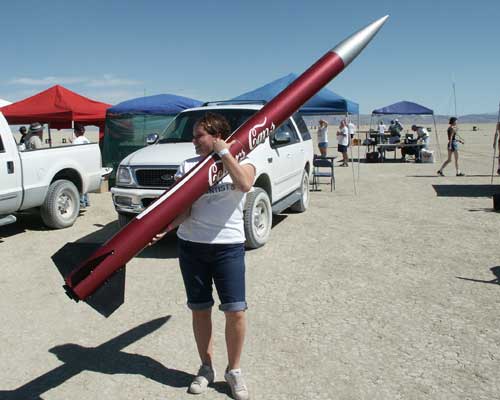
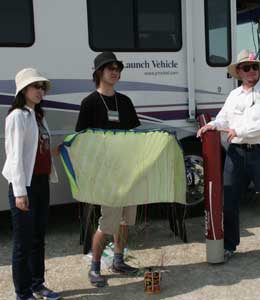
| Above you can see my ARLISS 2000 rocket assembled on the deck behind my house. | Here you can see the rocket assembled on the rocket stand at Black Rock with some of the students (and Sue McMurray). |
Aeronaut 2000
The ARLISS 2000 launches occurred at the Aero-PAC Aeronaut launch at the Black Rock desert on Friday, July 28th and Saturday July 29th. We flew eleven ARLISS flights, and all eleven functioned perfectly, delivering their loads of can sats to just under 12,000' as planned. Yes, that's eleven M flights in a row with no failures!
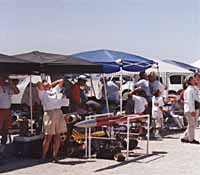
We arrived on Thursday afternoon at the Black Rock desert to set up the range and get ready for the first ARLISS flights the next day. (Aeronaut was a four-day launch from Friday through Monday.) Even though I was "ready" to launch, there was still a lot of stuff to do before the actual flight. (I was scheduled to fly at 10:30am on Friday.) Sue McMurray saw my plight and volunteered to help me finish and prepare my rocket so this was actually a joint flight.
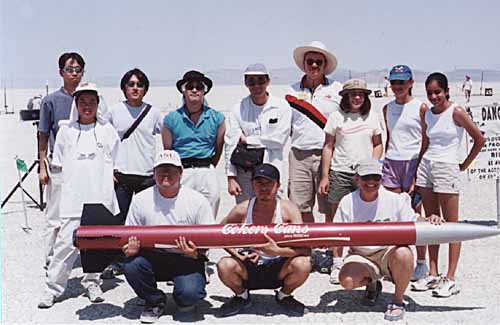
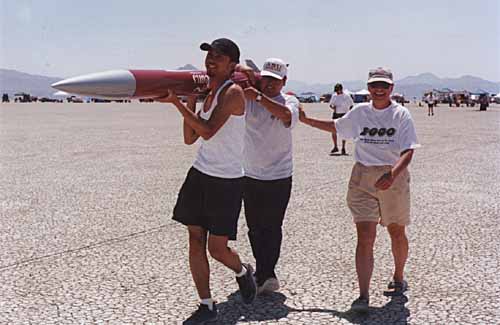
I also had the help of Robert and John in the setup and loading of the rocket. Above you can see us just after assembly of the rocket for the first time. From left to right: John Billings, John Coker, Sue McMurray and Robert (William Walby's nephew). Photo by Bud Billings.
The three can sats we flew on Friday were made by the University of Tokyo (U. Tokyo) students (two cans) and the Tokyo Institute of Technology (TITech). The mission was a joint GPS flight with all three can sats communicating with each other. U. Tokyo's can sats were called "mother" and "daughter" and both collected GPS position information and radioed it to the ground station. The mother can directed the daughter which GPS satellites to use and communicated with the TITech can. All cans operated properly and down-linked 3D GPS position data for the descent.
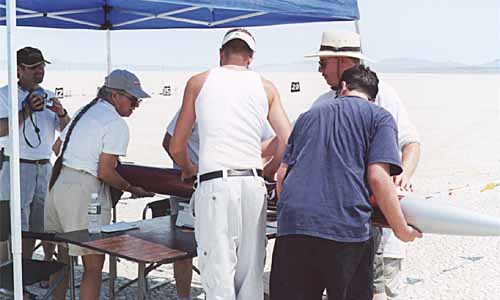
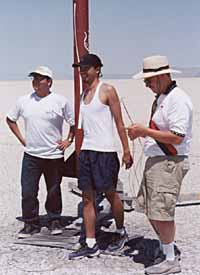
Above you can see us trying to weigh the rocket full-up. The Aero-PAC scale only goes up to 20Kg, so we estimated that the rocket weighed 45lbs. On the left is Gary Rosenfield; directing is Sue McMurray. Our helpers Robert and John have their back to the camera and you can see me on the right talking to the RSO who we can't see. (Photo by Bud Billings.)
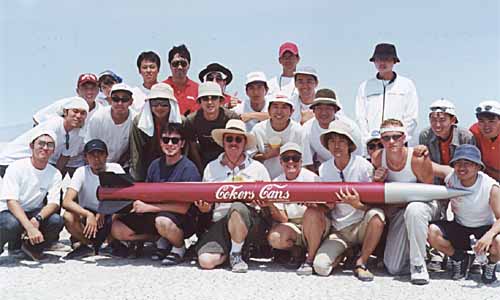
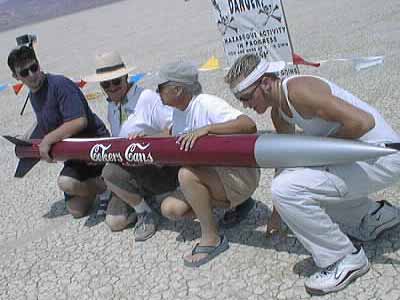
Above you can see the group for flight #4 (my Friday flight) posing with the rocket. (Photo by Bud Billings.)
 |
 |
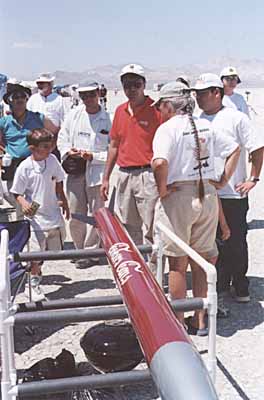
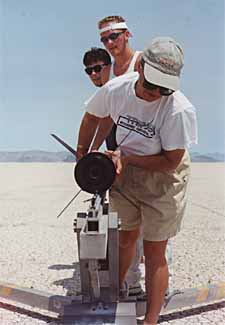
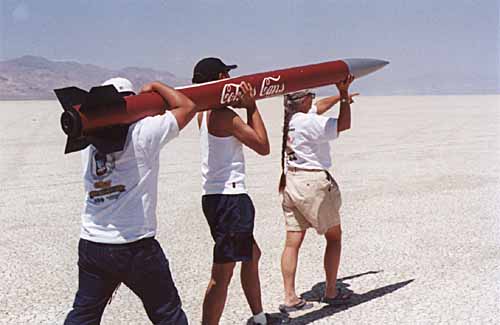
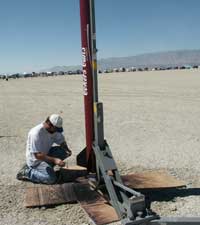
On the above left you can see John, Robert and Sue loading the rocket onto the rail. On the right you can see Sue holding the rocket while I install the igniters. (Photo by Bud Billings.)
 |
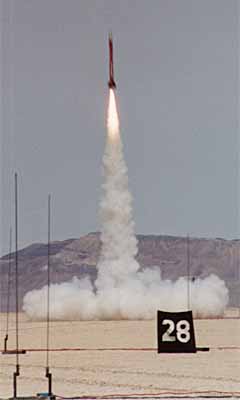 |
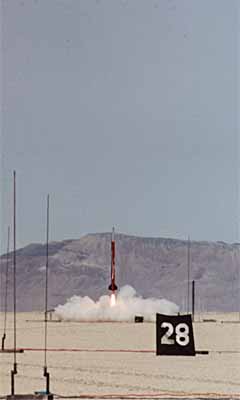
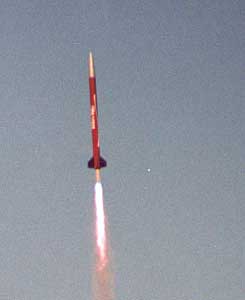
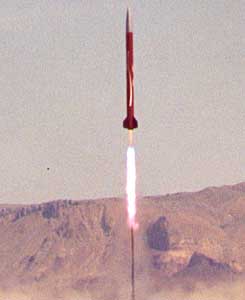
Above you can see two shots of the lift-off of this rocket. The AeroTech M1419 works wonderfully for this heavy rocket, providing an impressive takeoff. (These shots were taken three eights of a second apart.)
The rocket flew to 11,737 feet and was recovered in perfect condition about two miles from the launch site. All the can sats were recovered by their teams. Success!
We had planned for eight flights and had ten motors ready to go in case some of the students wanted to re-fly their can sats. On Friday, we'd only managed to make four flights of the six scheduled. This made Saturday a busy day. Not only did we manage to complete the planned eight flights, we even flew three more for a total of eleven for the weekend.
 On Saturday, I flew flight #8 with can sats from St. Andrews high school,
Kyushu University (Japan) and TITech.
This time, the cans all had separate missions.
The St. Andrews can (EagleEye) had a barometric sensor and a CCD camera.
The Kyushu can (MiCan) had barometric and temperature sensors.
The TITech can (DiamondSat) had a CCD camera.
All three cans used radio telemetry to report status to their respective ground stations.
On Saturday, I flew flight #8 with can sats from St. Andrews high school,
Kyushu University (Japan) and TITech.
This time, the cans all had separate missions.
The St. Andrews can (EagleEye) had a barometric sensor and a CCD camera.
The Kyushu can (MiCan) had barometric and temperature sensors.
The TITech can (DiamondSat) had a CCD camera.
All three cans used radio telemetry to report status to their respective ground stations.
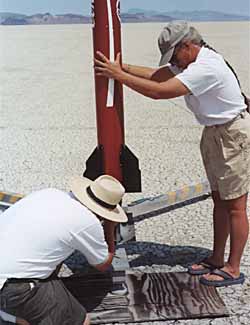
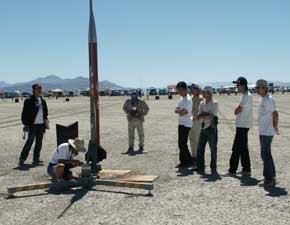
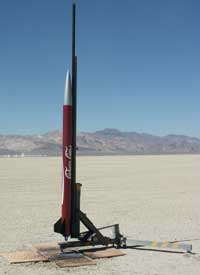
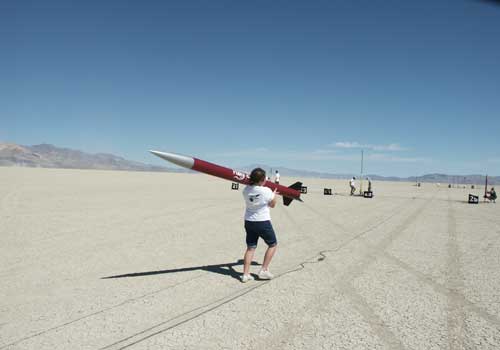
Above left, you can see my rocket assembled and ready to fly on Saturday morning as everyone watches another flight. After working out the kinks on Friday, I was ready to fly well in advance of my 12:30pm scheduled time.
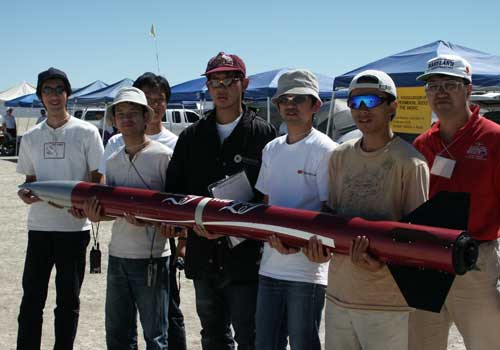
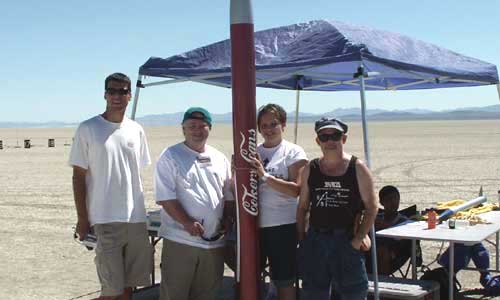
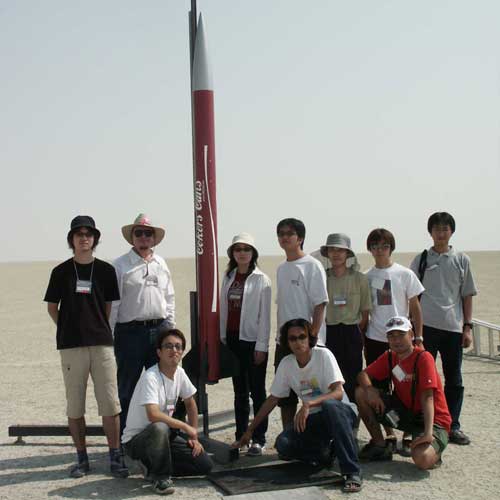
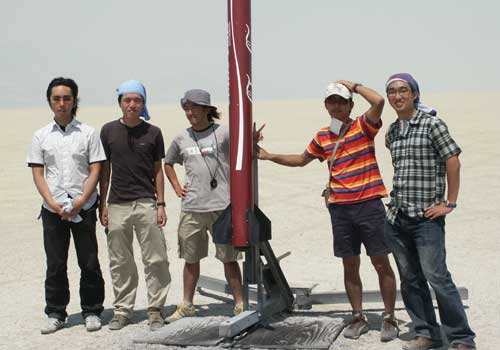
Above you can see the flight #8 group posing with the rocket ready to fly. (This was probably not all the students involved.)
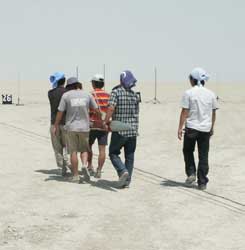
 Above you can see two of the Japanese students,
"Take" of Kyushu and "Hero" of TITech,
carrying the rocket out to the pad, under the direction of Sue McMurray.
(Sue was making them march to Air Force rhymes.)
Above you can see two of the Japanese students,
"Take" of Kyushu and "Hero" of TITech,
carrying the rocket out to the pad, under the direction of Sue McMurray.
(Sue was making them march to Air Force rhymes.)
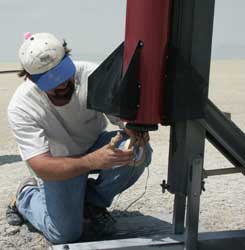
On the left are Take and Hero with the rocket while I prepare the igniter. They are obviously proud and I have a pretty happy smile on my face too... (Photo by Bud Billings.)
This flight went to 11,717 feet (only 20 feet lower than flight #4) and was also recovered with no damage. Another success!
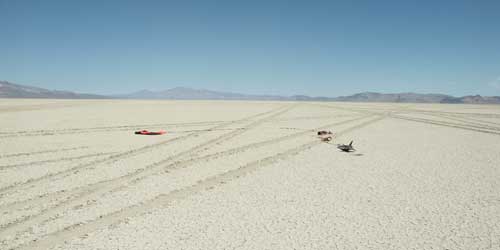
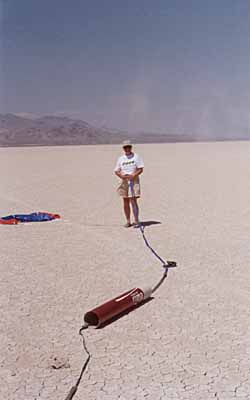 On the right you can see the rocket down on the playa,
again only a few miles from the launch site,
with all three pieces close together as Sue starts to bundle it up for
the trip back to my camp.
Even though this rocket comes down from apogee in three separate parts, we had an
easy recovery both days.
On the right you can see the rocket down on the playa,
again only a few miles from the launch site,
with all three pieces close together as Sue starts to bundle it up for
the trip back to my camp.
Even though this rocket comes down from apogee in three separate parts, we had an
easy recovery both days.
Having two perfect flights myself, eleven successful flights this weekend and fifteen successful flights for the ARLISS project (including 1999), makes it clear that HPR motors and techniques have come pretty far. At the risk of patting ourselves on the back too hard, it's a pretty impressive record. Certainly, much more so than I would have predicted.
The motors (AeroTech M1419s) all functioned perfectly and very consistently. All flights achieved just under 12,000 feet and my two flights were almost identical.
The ARLISS project continues. I flew twice more in 2001 as you can see below. For more information, see the ARLISS web site.
Aeronaut 2001
This year, we decided to fly using M2400s (3-grain blue thunder reloads) instead of M1419s (3-grain white lightning reloads). This would give us a little more authority off the pad as the rockets were in the mid-forty pounds ready to fly. As it turned out, Aeronaut 2001 had dream weather with no wind at all on Friday and Saturday so we would have been OK with the M1419s, but the M2400s still got about the same altitude with a better margin of safety.
 |
 |
On the left the first flight and on the right the second flight lifts into the sky. Those blue thunder motors make a great sight and sound!
I flew my rocket with basically no change from the previous year. The only thing I did do was add a switch to the electronics bay so that the G-Wiz and Adept units could be powered on from outside. (See the section on my electronics bay below.)
On Friday, I flew an open class payload for University of Tokyo students. "Open Class" is a newer part of the program where the students can design a payload larger than a soda can. They get the entire contents of the carrier (we basically just leave out the dividers). This year, the challenge was to build a payload which would fly itself autonomously. The University of Tokyo entry used a steerable parafoil and GPS.
In the photo above, you can see the students holding the rocket as we're just about to go out to the launch pad on Friday afternoon.
 |
 |
|
 |
 |
|
|
Above: Pius adjusting the launcher with students helping to move the rocket.
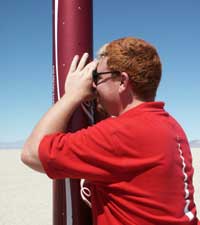
Top right: I'm arming the electronics and trying to see the LEDs in the bright desert sunlight. Above right: Chet Geyer installing one of his super igniters. Right: the rocket ready to fly its third ARLISS mission in its first flight of its second year. |
 |
|
After all pictures were taken at the rocket, we headed back to the flight line to announce the launch and fly the rocket. The rocket flew perfectly, ejected the carrier as normal and was recovered with no damage to fly again the next day. Lift-off weight was 43.25# and the rocket flew to 11,978 feet. The University of Tokyo payload did attempt to return the marked spot, but the parafoil shroud lines got tangled at deployment and it didn't reach the designated spot.
On Saturday, I flew three can sats built by employees of Lockheed Martin. Two were video cameras and one monitored temperature.
In this photo, you can see the three Lockheed employees and Cara Rosenfield, who is holding up the rocket.
Cara was a real trouper. She carried the rocket up to to RSO stand and held it during the pictures and for the RSO. She even carried it out to the launch pad. (This is a 44# rocket!)
The rocket again flew perfectly. The lift-off weight was 43.85# and it reached 11,882'. It was recovered without damage, even though the payload section parachute never deployed and both sections came down on just the booster 'chute. (Fiberglass rockets are tough and we're over-chuting the rockets.)
Recovery was harder this time, though. The rocket was far out to the north, perhaps 5 miles from the launch site. I flew a Walston tracker in the nose, which was a good thing because it took a while to find even with that help.
Aeronaut 2002
By the fourth year, we had the system down pretty well. We made 20 ARLISS flights in the first two days of Aeronaut 2002. I flew once on Friday and a second time on Saturday. Several new fliers joined the project so the load was reasonable, even though there were more flights.
This year, both of my payloads were "open class," something we started in 2001. It provides the entire area of the coupler for a single project. We can only fly a single open class payload per flight since the single open class payload takes the same space as three can sats.
On Friday, August 2nd, I flew the University of Tokyo parafoil open class payload. This unit used GPS and a steerable parafoil to return to a fixed point after landing. Most of the open class payloads were entrants into a contest to see which one could return closest to the point.

Above you can see the University of Tokyo team with their payload. They have a very nice web site. (Professor Nakasuka is in the center.) All photos by Renée.
 |
 |
Above you can see the electronics on the left and the parafoil (wing) on the right.
The rocket had a normal flight and recovery. It flew to 11,390' by the Adept ALTS25 and 11,309' by the G-Wiz. The rocket was recovered in a neat bunch and was ready to fly again the next day.
On my flight, the parafoil fouled on deployment, so they didn't get close to the target. However, they flew on Chet's rocket on Saturday and returned to only 45m away from the target! This is by far the closest any team has come and is very impressive given that they start 11,500' (3550m) up in the air.
On Saturday, I flew another open class parafoil payload for Kyushu University. This was another entrant in the contest to see who could return autonomously to a predefined GPS location.
 |
||
 |
 |
|
 |
||
In the sequence above, you can see the Kyushu students with the rocket, them carrying the rocket out to the pad, Chet installing the igniter and the usual dumb rocket photo.
The flight was perfect and the Kyushu payload was deployed. However, the parachute on the payload section did not inflate completely and this section of the rocket landed hard. The payload tube and electronics bay were damaged and the coupler zippered. (The batteries came loose on both electronics so no altitude was recovered.)
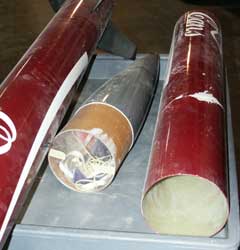 |
 |
As you can see, the payload section has taken some significant damage. The close-up on the right is particularly interesting as you can see where the tubing flexed along the filament bundles and shed the paint. I will rebuild the payload section for next year, which will also give me an opportunity to redesign the electronics bay to make it easier to prep.
The Design
The design for the ARLISS rockets is a refinement of a system designed by William Walby and Pius Morozumi for the ARQUE project they did for NASA. The airframes are 6" diameter tubing and the fins and all interior parts bolt on. This makes a very modular and easily repairable rocket. See the ARLISS web site for airframe drawings by Tom Rouse.
 The fins are
blacksky
Optimal 150 fins and they bolt through the airframe tube to an aluminum fin can.
This makes the fins easy to replace if they get damaged and allows the rocket
to be completely taken apart.
(The Optimal 150 is an out of production kit.)
The fins are
blacksky
Optimal 150 fins and they bolt through the airframe tube to an aluminum fin can.
This makes the fins easy to replace if they get damaged and allows the rocket
to be completely taken apart.
(The Optimal 150 is an out of production kit.)
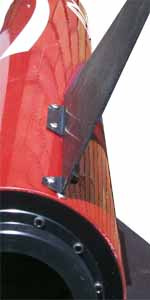
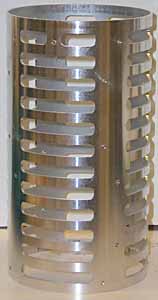
On the left you can see how the fins bolt onto the airframe using 8-32 machine
screws and on the right you can see the aluminum fin can which they bolt to.
The booster is 48" long and contains the motor mount tube and the parachutes for the booster and sustainer (which are recovered separately). The payload section is 36" long and contains the electronics bay and the carrier for the can sats.
 As you can see from the picture of the payload section on the left,
the interior structure is also bolted in place. The screws hold the coupler/bulkhead
assembly, the removable electronics bay and the bulkhead which supports the carrier.
As you can see from the picture of the payload section on the left,
the interior structure is also bolted in place. The screws hold the coupler/bulkhead
assembly, the removable electronics bay and the bulkhead which supports the carrier.
 The bulkheads support the motor mount tube and create the
interior structure in the payload section.
These are built in short section of coupler and slide into the airframe.
I used threaded inserts through the plywood bulkhead plates to anchor the bolts from the
outside.
The bulkheads support the motor mount tube and create the
interior structure in the payload section.
These are built in short section of coupler and slide into the airframe.
I used threaded inserts through the plywood bulkhead plates to anchor the bolts from the
outside.
This design is unusual for high-power rockets, but has some distinct advantages. Less than total damage to the rocket requires only replacing the damaged part since no large pieces are assembled using epoxy. Of course, this requires a strong airframe to support the screws. Last year, they used left-over canvas phenolic (also from blacksky), but this year we decided to build the new rockets out of Hawk Mountain all-fiberglass tubing.
My ARLISS rocket used my current favorite style of electronics bay, which slides into the airframe allowing easy prep of the electronics before being installed in the rocket as a single unit. Since several people have asked about this style of bay, I took some close-up pictures of my ARLISS rocket bay. (Click on the pictures for larger images.)
This version of the bay has separate bulkheads at the top and bottom. (The rocket is very modular.) My usual configuration has the ends built into the bay so the whole thing is a single unit and the charges can be taped right to the top and bottom of the bay before it is installed in the rocket.
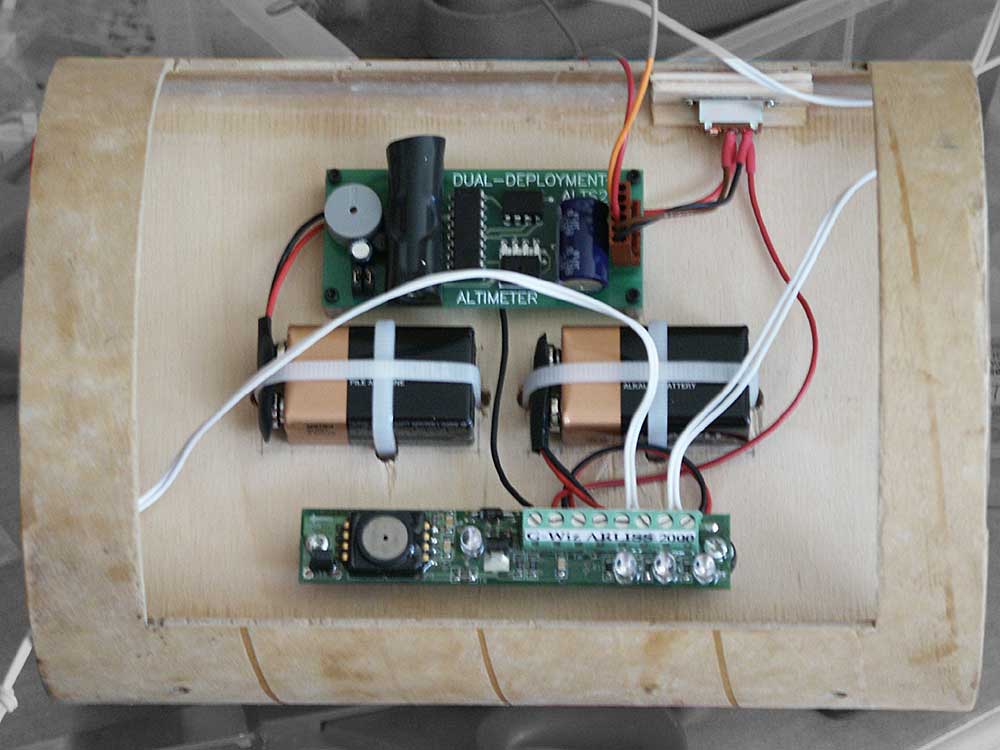
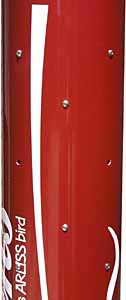
Note that the switch for both altimeters is mounted inside the bay, with the slide switch tab facing out through a hole. This hole lines up with one in the airframe, making it easy to switch the electronics on and off from outside the rocket.
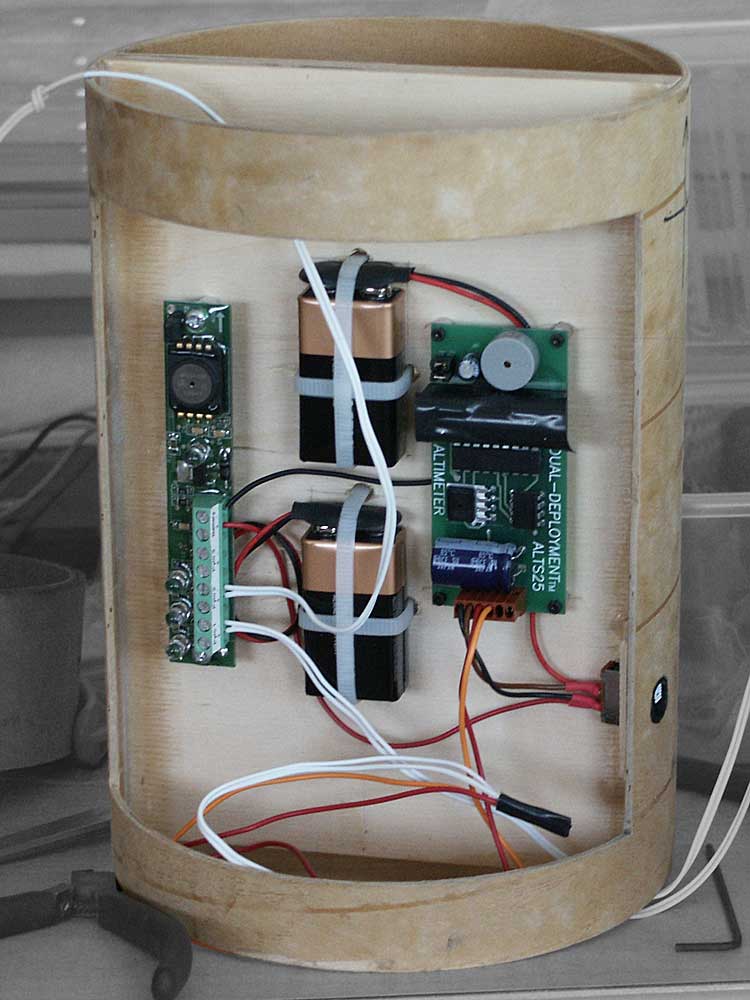
In the insert above right, you can see how the switch pokes through the side. To make it easy to see in the bright sunlight, I paint the surroundings black and the switch tab white.
Since we built more rockets in 2000 (four new ones by Tom Rouse, Ken Biba, Pius Morozumi and mine), we decided to assembly line the process. I built the bulkheads for the four new rockets plus replacements as needed. This turned out to be a lot of work, but produced great parts and helps to keep all rockets consistent.
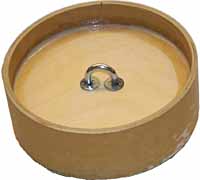
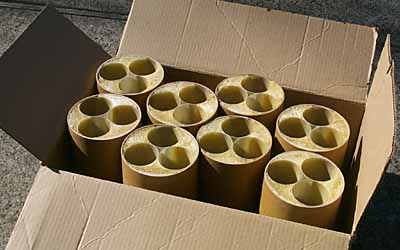
Unlike the first year, we decided to make the can sat carriers ourself, to ensure consistency. (Initially, the students supplied their own carriers.) Pius made up some custom fiberglass tubing using a mandrel he made which perfectly fit soda cans. I made up the couplers with double bulkheads and U-bolts and we mounted the tubes into the carriers and filled up the spaces with expanding foam. These came out great and will be a perfect fit for the can sats. (For 2001, we had to make 25 new carriers, so we used a simpler design.)
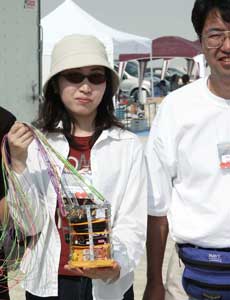
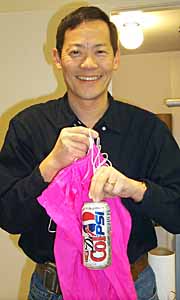 Each satellite is in the form factor of a soda can, hence "can sat."
On the right you can see Pius with a prototype can sat with parachute attached.
We call this one "frankencan" since it is half Coke® and half Pepsi®!
Each satellite is in the form factor of a soda can, hence "can sat."
On the right you can see Pius with a prototype can sat with parachute attached.
We call this one "frankencan" since it is half Coke® and half Pepsi®!
This project was a lot of fun, even though it was a lot of work. Group projects have a lot of rewards that normal (individual) rockets don't provide. The insights and ideas from the other team members are amazing sometimes. Not to mention the fun of working with other people on a cool project.
The ARLISS project is particularly cool because we're launching rockets for a real purpose. Our rockets aren't just expensive toys, but are actual launch vehicles launching actual experiments. While we can't (yet) make it to orbit, we can give the students' experiments a real ride and many of the same forces and conditions they will experience in commercial and scientific satellite launches.
See the ARLISS web site for more info.