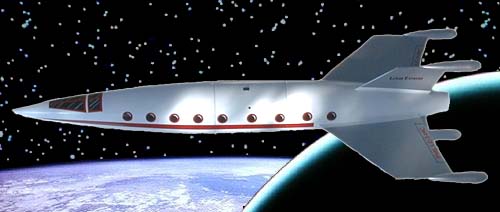
Lunar Express
Of the new P.M.L. kits for late 1998, one really stood out: the Lunar Express. This rocket is a forward-to-the-past type of rocket, a real 1950s design for a futuristic rocket. Well, I just had to build it!
As an aside, I get tired of all the kits looking basically the same. The standard 3FNC (three fins and nose cone) look gets old pretty quickly. P.M.L. did a nice job of producing an interesting kit with appealing aesthetics. Now, we'll see if it can fly more than once!
The Pictures
A slightly fanciful setting:
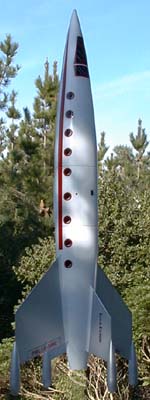
And in my front yard:
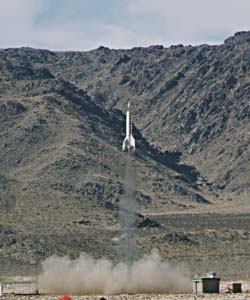
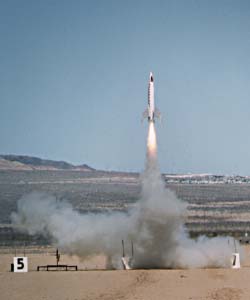
On February 13, 1999 at the February ROC launch in Lucerne Dry Lake, the Lunar Express flew for the first time. The boost was straight and sure, without any uncertainty or instability on a J180.
 |
 |
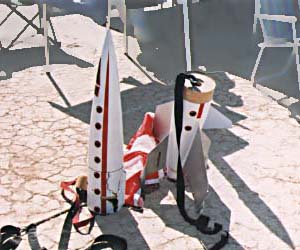
I was sure that this kit was going to suffer major damage on landing. Those oversized fins with the silly pods on the tips are just fragile. However, only one fin pod broke off, and it can easily be re-attached. All in all, a successful flight!
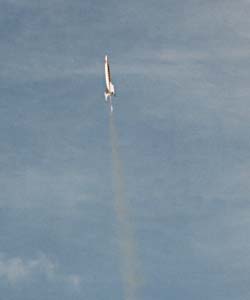
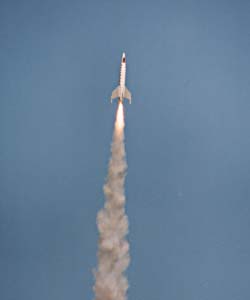
The second flight was at Springfest '99 on March 21st. This launch is put on by L.T.R. at El Dorado dry lake outside Las Vegas. This time, I decided to fly it on a K185, again a low-thrust long-burning motor.
 |
 |
This time, the rocket didn't survive as well as on its first flight: separation! The tail section came down on the parachute with only two pods broken off, but the nose and body section came down without a parachute and the body tube pretty well smashed.
 |
 |
Well, ultimately it was my own fault. I should have known not to use the P.M.L. elastic band, especially after I had this same failure on my P.M.L. Bull Dog. But, the P.M.L. elastic looks strong! Interestingly, on my Bull Dog the elastic broke where it was tied around a quick link, but on the Lunar Express it just broke in the middle.
The Kit
The kit is standard P.M.L. style, although the details are less well worked out than the Bull Dog was. (It's easy to tell this is a new kit.) The centering ring for the recovery tube had a very large center hole. I should have re-cut it, but I decided to use the one which came with the kit and fill up the gap with epoxy.
The motor mount is built around the Qwik-Switch system and I built the rocket as described in the instruction. However, unless you actually plan to use 38mm motors in this rocket, I'd suggest using a slightly longer motor mount tube (an extra inch should do it) and skip the brittle plastic between the top of the motor mount tube and the centering ring.
The fit of the pieces was very tight. I wore myself out sanding the pieces so that they fit reasonably. There are two breaks: one right above the fin can for the recovery system and one where the nose cone fits into the short center section (for setting up the altimeter.) Hopefully, the second iteration of these kits should have addressed these problems.