Meaner Machine
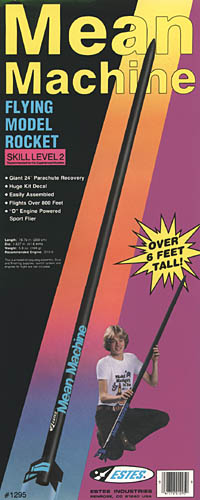
The Estes Mean Machine(TM) kit was one I remember wanting, but not being able to afford the first time in this hobby. So now, as a B.A.R., I can have it easily. (Also, the kit cover picture is priceless.)
I decided to high-power it by adapting it for 29mm motors so its name is now the "Meaner Machine." Adding a 29mm motor mount, fiberglassed tubes and fins and altimeter dual deployment is the final irony. $23 for the kit, $200 for the accessories. Actually, I ended up buying two Mean Machine kits (because I needed more couplers) so perhaps it should be the "Mean Machine2." (Or "Mean2 Machine?")
The Pictures
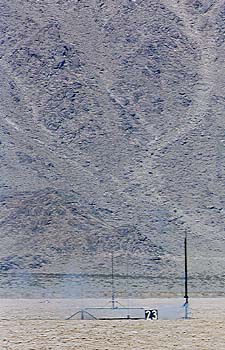
I launched it for the first time on an AeroTech G-80. This should have produced a spectacular flight, but instead the motor sputtered for many seconds, wasting the precious thrust. The motor did finally start to burn, but not with enough energy left to get proper altitude for the altimeter.
 |
 |
|
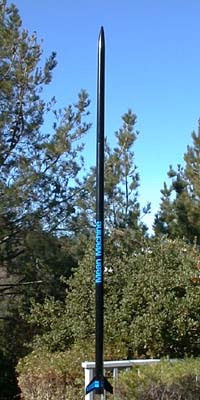
| The Mean Machine looking lean and mean indeed. | The Mean Machine on the ProRail with the G-80 sputtering out its life. |
The Estes Kit
The kit still has a priceless cover picture. Dig that kid with the Farrah Fawcett layered hairdo and the trippy "Model Rocketry is Fun" T-shirt! This is probably the same cover it had when I was a child. (Yes, I'm a Gen-Xer, not a boomer.)
|

I want one of those shirts. In XXL.
So I got one made!
|
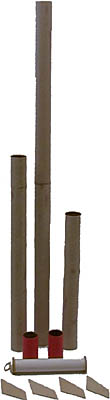 I used the Estes body tubes and nose cone, but not much else.
I wanted to keep the overall dimensions the same while making the rocket use dual-deployment
recovery and an altimeter (just to complete the irony).
Because I was using a 29mm motor mount and wanted to use through-the-wall fin mounting,
I re-cut the fins from 1/16" plywood and fiberglassed them
(double 2oz. wrap plus .56oz. veil).
The three body tube sections were built using the Estes tubing and then fiberglassed as well
(also double 2oz. wrap plus .56oz. veil).
I noticed later that the Estes tubing has almost the same O.D. as Loc/Precision
38mm motor mount tubing, so that would have been a stronger replacement.
But, I had to use some parts from the kit!
I used the Estes body tubes and nose cone, but not much else.
I wanted to keep the overall dimensions the same while making the rocket use dual-deployment
recovery and an altimeter (just to complete the irony).
Because I was using a 29mm motor mount and wanted to use through-the-wall fin mounting,
I re-cut the fins from 1/16" plywood and fiberglassed them
(double 2oz. wrap plus .56oz. veil).
The three body tube sections were built using the Estes tubing and then fiberglassed as well
(also double 2oz. wrap plus .56oz. veil).
I noticed later that the Estes tubing has almost the same O.D. as Loc/Precision
38mm motor mount tubing, so that would have been a stronger replacement.
But, I had to use some parts from the kit!
The couplers from the Estes kit were pretty weak looking: thin cardboard and only 1 1/2" long. So, I lengthened and strengthened the couplers by putting two end-to-end (requiring the second kit) and fiberglassing them inside (strips of 4oz. cloth). Now we've got a high-power rocket!
I really like the look of this rocket. I managed to keep the appearance of the original Estes rocket by using the same overall body tube length, nose cone and same size fins. Of course, the entire rocket is built with epoxy instead of white glue. The airframe is cut into three parts to accommodate the altimeter section in the middle. Two of the original body tubes make the tail section, slightly less than one makes the altimeter bay section and slightly more than ones makes up the front section. The end result is that the rocket maintains the same finished dimensions as the original kit.
This rocket is basically scratchbuilt: a 1:1 scale version of the Estes kit.
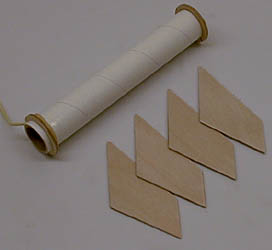
The altimeter needs to fit inside the small tubing. I used a Transolve P2 since it's narrow and this rocket, of all of them, can accommodate the extra length. This involved even more couplers and a custom altimeter plate and end bulkheads to fit in them.
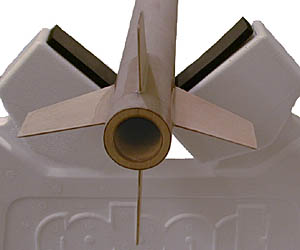
Making an altimeter bay for such a small diameter rocket takes some ingenuity. What I ended up doing was suspending the altimeter mounting plate between a pair of couplers and bonding an end plate inside each coupler to seal the bay. However, since this was a dual-deployment bay, I needed it to stand strong forces pulling from both ends. To support this, I ran a piece of threaded rod through the bay and mounted the eye-bolts on each end. That way, the recovery systems pull against each other along the metal rod. The whole thing slides right into the smallest center body tube section.
The diagram in the upper left shows one end of the bay (both were the same).
The altimeter mounting plate and end plate meet and are epoxied together
and to the inside of the coupler. In the picture below you can see the bay from the top
with the altimeter mounted to the plate.

I finished the rocket with the kit specified paint scheme. The only modification I made was to remove the Estes logo from the rocket name. I probably should have kept it, but I thought it was a bit tacky for them to put their name on my rocket, so off it went.