Fin Beveling
I've always admired the 10° bevels on Dynacom fins, but hand sanding a consistent bevel is very hard. Finally, I needed to bevel the fins on my Arreaux upscale project so it was time to find a way to do it. Precise cutting of G-10 fiberglass is pretty hard, although one could imagine using a router jig to make it work. Instead, I decided to use a disk sander.
Disk sanders are not an everyday tool, but they are common in home workshops and smaller size ones can be purchased inexpensively. They are also a very useful tool for modelers, allowing quick but controlled stock removal. If you have access to a disk sander, you might like to give my technique a try. I used a 12" disk sander, but since you're actually sanding a very small area, a smaller sander works fine, and is probably safer to use.
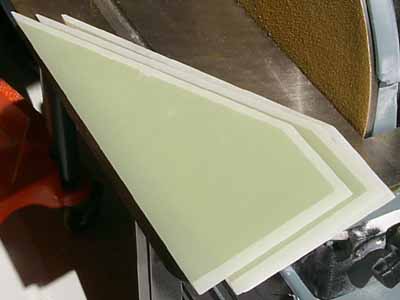
First of all, let's look at the results. Consistent and accurate results are almost impossible to achieve by hand, but look at how my Arreaux fins came out! (See a close-up of the corners.)
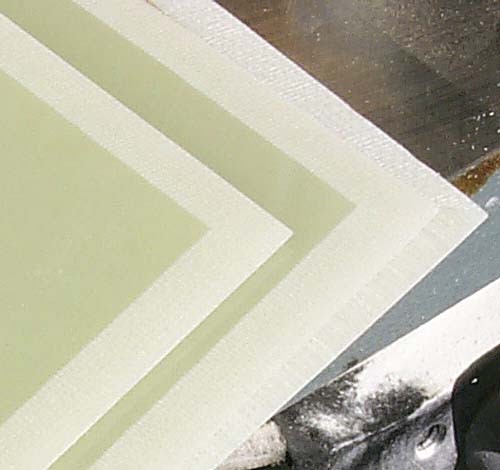
Using the Jig
Trying to hand guide a fin through the disk sander would be just as hard as sanding by hand, not to mention extremely dangerous. 10° is a very acute angle and that leaves your knuckles too close to the sanding disk. So what do we do? We build a jig!
Since my disk sander table only tilted up and down by 50°, I built a jig whose face was angled 80° from its bottom. This meant that the face would be at a 10° angle to the disk when the table was set at 90° (the normal position). It was also important to have a plate at the bottom of the angle for the edge of the fin to ride on as it was pushed past the disk.
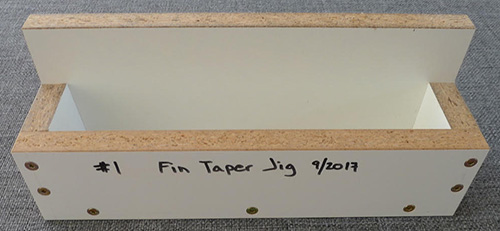
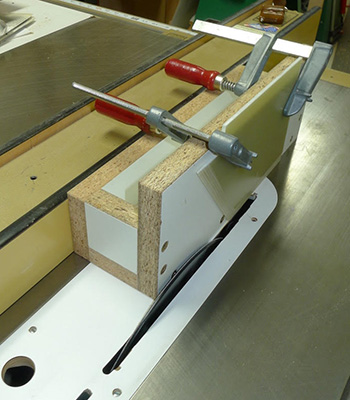
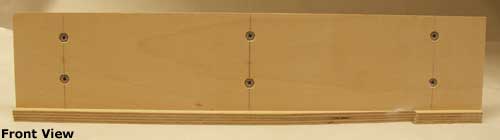
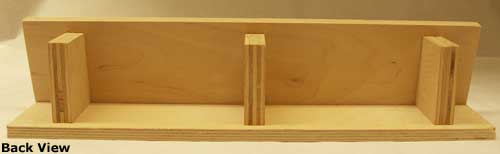
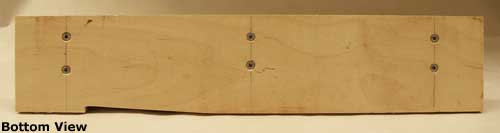
Below you can see the finished jig. Note that "floor" at the bottom of the angled face. Also note how the floor is relieved ¾ of the way along to allow clearance for the disk. This way, the fin is supported by the floor in front and behind of the disk as it passes over. (For more details, see Building the Jig below.)
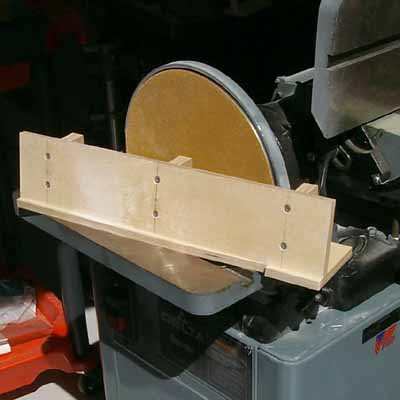
I built my jig out of birch plywood (always good jig material). The base and face are ½" plywood and the supports are ¾" plywood to provide enough thickness to screw into. The jig is glued and screwed together, making it very strong. Note that you must recess the heads of the screws so that the jig will sit flat on the table and the fins won't hang up on the face.
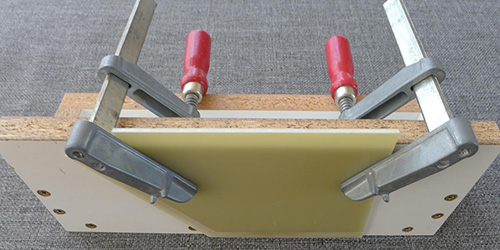
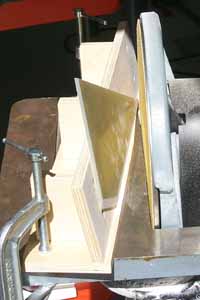 The picture on the left should make it clear how the beveling is done.
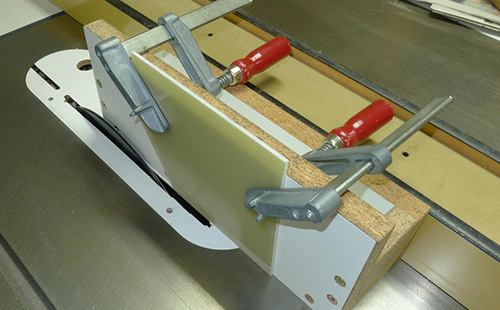
The jig is clamped to the table and the fin is moved into the disk, supported by the jig.
The picture on the left should make it clear how the beveling is done.
The jig is clamped to the table and the fin is moved into the disk, supported by the jig.
Place the jig at an angle to the disk. If the face was parallel to the disk, it would be hard to start the fin, but by placing it at an angle, you can feed the fin in and the sanding occurs right at the edge of the disk. Position the jig so that the closest part of the face is a little more than half the thickness of the fin from the disk. This distance controls the thickness of the edge.
When feeding the fin past the disk, keep it tight up against the jig all the way through. Also, make sure the edge you're beveling stays against the base of the jig all along its length. These two things are key to a consistent bevel.
Unfortunately, this brings your knuckles very close to the disk. Be careful! That disk will win a contest with your skin every time. (This is why a smaller disk would be safer, since your knuckles would pass above its edge.)
Another thing to be careful of is the dust from the fiberglass. Fine fiberglass dust, especially dust produced by sanding, is very bad to breathe. The fine particles get a static charge from the sanding process and will stay in the air for a very long time.
Wear a respirator and protect your hands and arms from the dust. Even though the dust doesn't really hurt your skin, it's almost impossible to wash off and you will feel "itchy" for days. I use latex gloves and disposable sleeves. Also, keep a shop vacuum on and pointed at the part of the disk where most of the dust comes off as you work to collect as much of it as possible.
Building the Jig
The jig is made out of two faces of ½" plywood and three supports of ¾" plywood. The front and bottom are rectangular pieces and the supports are almost rectangles, but have one angled side which gives the face its angle relative to the base (and to the disk sander).
 |
 |
 |
I chose to create 10° bevels on my fins and so the back is angled 80° to the base (or 10° short of 90°). If you want to make longer tapers, you would use a smaller angle, but it will be harder to run the fin through the jig without sanding your fingers.
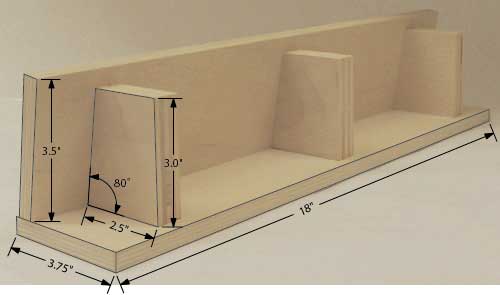
In the picture above, an isometric view of the jig from the back shows the dimensions of the parts. Note that the size isn't really critical; all that matters is that the angle between the front and the bottom create the angle necessary for the bevels.
Jeff Boldig's Variation
Jeff Boldig sent me info on his version:
I was looking at your fixture for beveling fins and was thinking that it should work well on a router table too. You would have to have a long enough bit and maybe make the base of the fixture a little thinner, or eliminate the "floor" completely and use the table top of the router table instead.
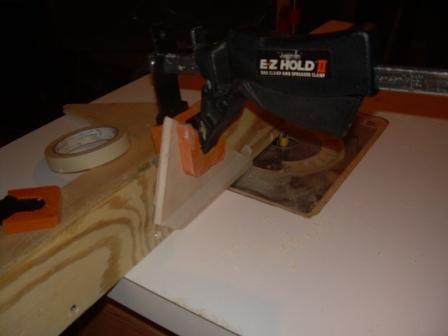
I set the fixture up. It really wasn't much. I kind of whipped it up on the spur of the moment. I set the table saw to 10º and beveled the edge of two pieces of plywood. Then attached the two with screws. I set the fence on the router table, clamped the fins to the fixture and ran them through. They turned out quit well.
The one important thing when using the router, is put some masking tape along the top edge of the bevel and press it down very well. This will keep the top layer from splintering when cutting across the top layers grain.
Fins cut out on table saw:
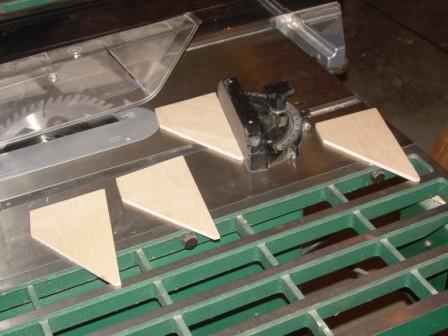
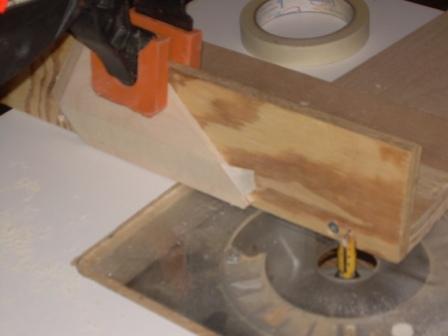
Cutting bevel #1:
Cutting bevel #2:
Fins beveled:
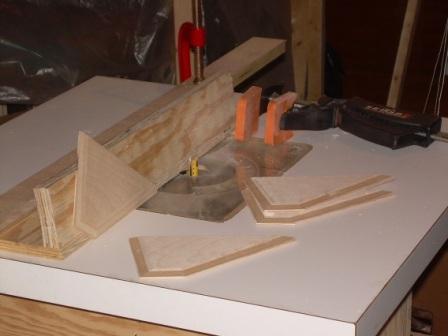
Jeff's jig is simpler than mine and it keeps your fingers away from the cutting blade. Thanks for the tip!
Richard Dierking's Mods
Richard Dierking posted his version to the ROC email list:
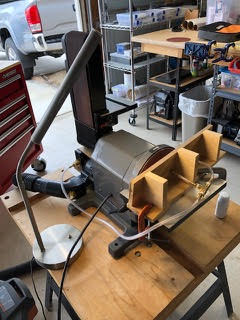
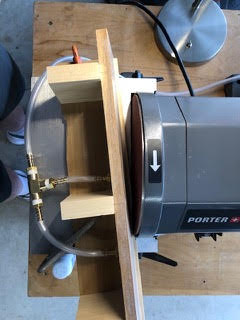
I made an addition to John’s jig for beveling fins. The fin jig arrangement for a disk sander works great for G10 and not so good for aluminum. Aluminum seems too tough of a material for this arrangement.
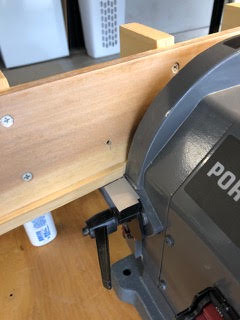
Anyway, for the small fins I was making, it was difficult to hold the fin flat against the fence during the bevel. There’s a worrisome pinch point between the fence and disk, and wearing gloves could be worse. So, I used some brass fittings and 1/4” hose to create two suction points on the fence. These hold the material against the fence so all I had to do is push the work through. For the vacuum, I first tried coming off the connection for the shop vac. Then found that the sander itself has a small fan to collect and discharge dust. So, I connected just ahead of this.
 |
 |
|
 |
Jim Gealy's Version
Jim Gealy sent met info on his version:
The device uses a table saw, a 3° tapered aluminum 10” sanding disc, special sandpaper (80 grit aluminum oxide) and a home made sled to hold the fin to be tapered. The sanding disc and special cut-to-size PSA sandpaper can be purchased from Woodworker Supply.
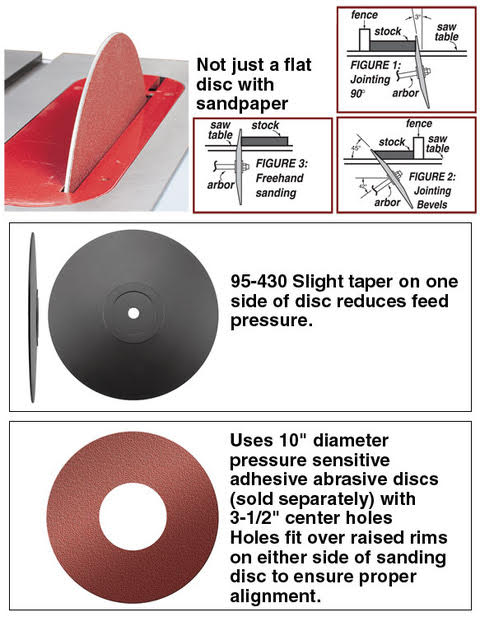
The sled was made from double sided 3/4” melamine. The shorter side is just high enough to clear my tablesaw fence. To cut a taper, you set the edge to be tapered hard against the tablesaw surface and clamp the fin to the tall face of the jig with screw clamps. The disc has a 3° taper so you take the total fin bevel you want (say, 10°), divide by 2 (5° for each side of the fin), then subtract the disc taper from that. This gives a result of 2°. That’s the number you crank into your tablesaw blade tilt. You then set the tablesaw fence so that the fin just kisses the sanding disc with the fin attached to the sled and the sled against the fence. Turn on the tables and slowly run the fin and sled across the revolving sanding disc while held tightly against the fence. I run the fin back and forth 2-3 times and adjust the fence as necessary to give me the width of the bevel and the residual leading edge thickness I want. When one side is done the way I want it I run the remaining fins through the tablesaw without changing the fence setting. I then flip the fins over and do the other side.
The geometry of this tapered disc has several advantages. First, you can dial in any taper angle you want without having to construct a sled dedicated to a specific desired angle. Second, the taper means that the sandpaper will contact the fin only at one spot in a vertical line centered on the arbor of the tablesaw. Third, the disc only has to protrude above the tablesaw surface a little more than the width of the taper so the chances of getting a finger or knuckle sanded off is pretty low.
I use 80 grit aluminum oxide on G10 fiberglass fins and that seems to work pretty well. It is possible to switch to a finer grit but since the sandpaper is adhesive, you would have to peel it off and replace with a finer grit, which would waste a lot of sandpaper. It would be better to have two or more discs, one for each grit. I’m happy with the 80 grit finish, though you could touch it up with a sanding block if you wanted.
This jig produces a sharp line where the taper on two fin sides meets. You do have to be sure the fin is dead flat against the jig or you will get a scooped taper. If the fin is warped, you can sandwich the fin between the jig and another piece of scrap melamine or other material to flatten it for tapering. I have not tried it on aluminum but I suspect it might gall the aluminum or clog the sandpaper.
Here are some pics of the fin, sled and tablesaw setup: