Crayon Pack
Since a friend pointed out that my I-ROC looked like a Crayon®, I've had the idea in back of my mind to build a Crayon rocket. Not just a Crayon rocket, but a pack of Crayon rockets! The smallest pack of Crayons I could find had eight, so that is the number. Of course, the eight rockets are pretty much standard mid-power rockets. But, they were to be launched from a box (the yellow and green Crayon box, of course) in rapid succession.
I decided to build the kit from Loc/Precision components, since they have a nice selection listed on their site, including pre-slotted airframe tubing, which will save a lot of work.
Note that this project suffered a long hiatus. I actually started it in 1998, and it was one of my first scratchbuilding projects. Work resumed in August 2004, more than six years later and finally completed in September, just in time for XPRS.
The Pictures
 |
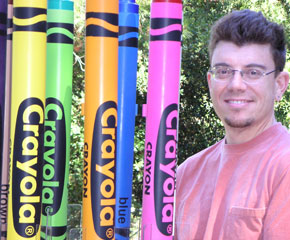 |
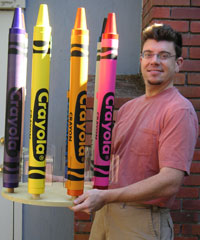
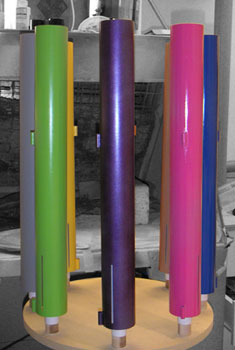
Here I am in early September 2004 with the eight completed Crayon rockets. These were six years in the making and now they're done!
XPRS 2004 (Half Way)
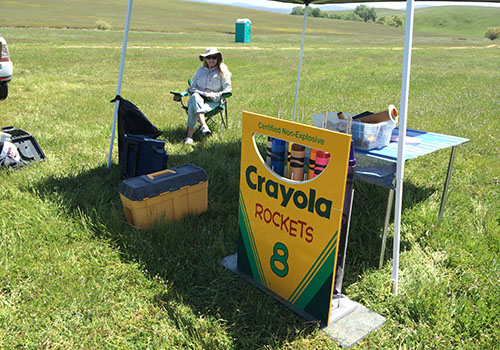
XPRS 2004 was a fantastic launch with three days of perfect launch weather with moderate temperatures, clear skys and no wind. We arrived on Thursday for set-up and put the crayon pack on display until Sunday, when I finally had time to launch them.
 |
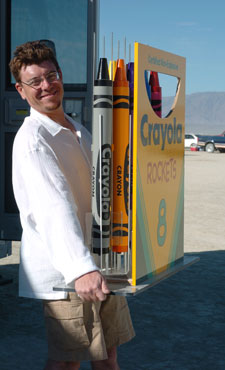 |
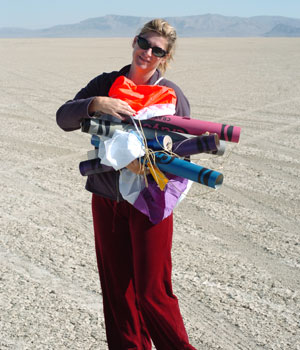
Above you can see the crayons in their "box" and me starting to carry the whole thing out to the range on Sunday morning (September 26, 2004). The "box" is pretty heavy and with the eight crayons it becomes awkward to carry.
Above you can see another view of the pack as I'm staking down the edges of the acrylic base to which the box is attached. The stakes probably aren't necessary, but it seemed a prudent thing to make sure the box didn't fall over.
Paul Suchek dipped eight DaveyFire 28F electric matches in IgniterMan pyrogen for me to use. The nozzles on the G40s are quite small so you can't get much pyrogen onto the tips of the 28Fs and still get them into the nozzle. Above you can see me wiring up the eight igniters in parallel.
Since these rockets use motor ejection and were already installed in their "box," there wasn't much to do other than connecting the igniters.
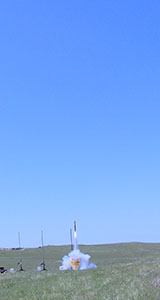
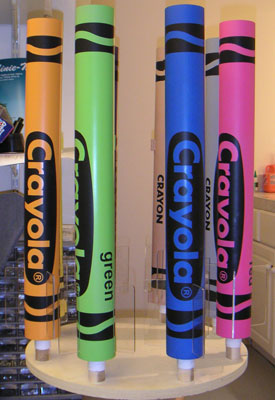
Here is the the obligatory "dumb rocket photo" with the Crayon Pack ready to fly. The high contrast of the desert sunlight puts the crayons into deep shadow; In person, the different colors looked good through the cut-out in the box front.
 |
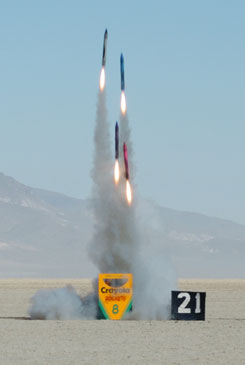 |
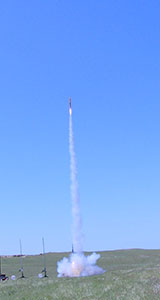
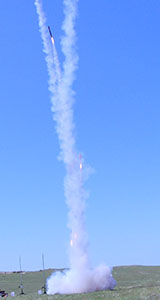
Launch! Up go the crayons. Wait; only four of them went!
Below is a great picture from Steve Pope, showing the crayons up close just as the four are leaving the box.
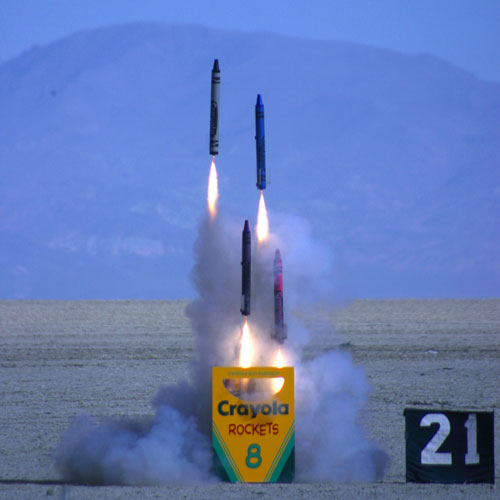
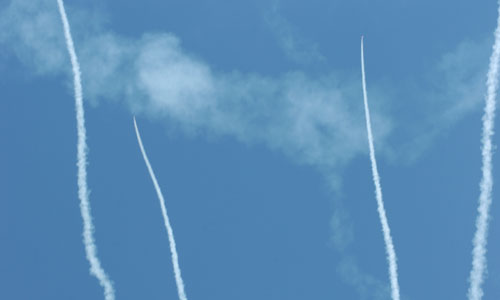
All eight of the DaveyFire matches popped, but only four of them ignited their motors. The four that did fly flew very nicely as you can see in the pictures above.
If I would have gotten one failure, that would have been OK, although I'd really been expecting all eight to fly. But four; that's only half of them!
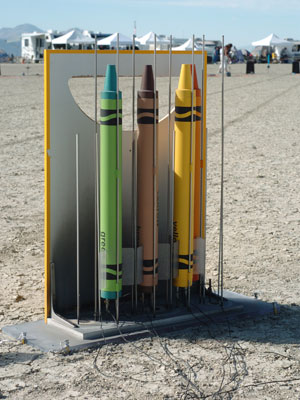
Here you can see the four crayons that remained in the box. What's wrong green, brown, yellow and orange?
The bottom of the box got pretty blasted with residue from the other four motors, but the crayons that didn't fly were still in good condition. That, and the fact that only four flew, made me determined to try again.
Of course, the question was what condition would the other four be in? Aside from some soot, the four left behind were ready to go again. Would the other four fare as well?
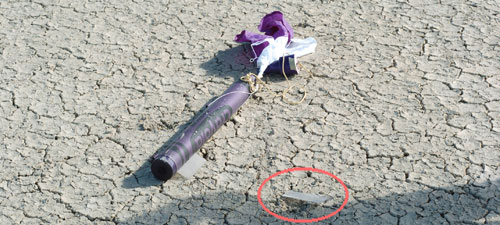
The first one we found was the violet crayon. And it had a broken fin. Well, no second try at XPRS. The violet crayon fin broke cleanly in the acrylic, near the slot in the body tube. This can be easily repaired with acrylic cement and violet can fly again.
However, the other three were found without major damage. Above, you can see my wife Renée with the four crayons that flew.
The crayons went pretty high on the G40s. RockSim had predicted they would fly to 2928 feet. (The rockets weigh one pound each.) The 10 second delay must have been just about perfect because there was no zippering of the paper body tubes at all.
LUNAR 2014 (All 8)
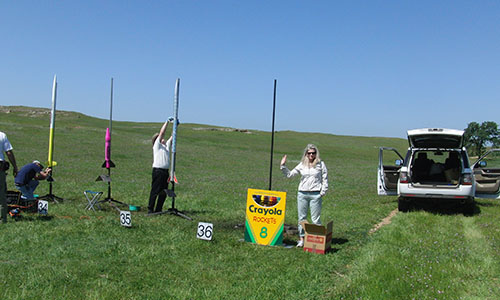
Nearly ten years later, I tried again to launch the Crayon Pack, this time at the LUNAR Snow Ranch launch of April 12, 2014, again on G40s. This time, all 8 flew!
We arrived at Snow Ranch about 11am, and set up a modest camp. Here you can see the Crayon Pack and my lovely wife Renee.
It was quite a bit of work (and took two tries) to get all the igniters hooked up. The first time, I tried using a clip whip; when that failed, I just wired all the igniters together.
From high-speed photos, we can clearly see that there was a significant delay before any lit, the one lit, then the rest in a rush.
 |
 |
 |
We recovered all but one (the purple) rocket, several through the kindness of people who stubled across them. Once again, all survived just fine, except one fin broke (the red).
This was a wonderful culmination to a very long project (16 years!).
The Design
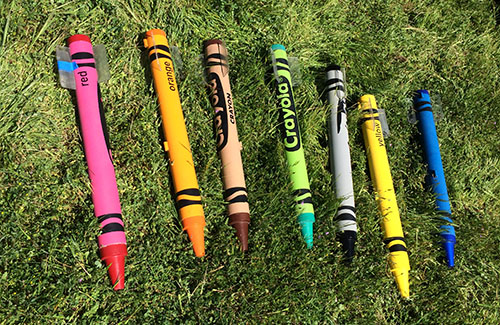
A Crayon is 93mm (3.66") long and 9mm (0.35") thick, overall. The outer paper wrapping (construction paper) is about .5mm thick, so the ends of the Crayon are actually thinner than the body. To build this into the rockets, I needed a nosecone with the transitions and a tail section with a thickness reduction. In the diagram below, the gray area indicates the paper wrapper (and main body tube in my rockets) and the black outline indicates the overall size of a Crayon. All dimensions are in millimeters.

This is a bit stubby for a rocket (10x as long as their width), but well within the allowed limits. Since I decided to use Loc/Precision 2.56 tubing (66.8mm) and the widest part of a Crayon is 8.6mm, my rockets are 7.77x scale.
| Dimension | Crayon | Rocket | ||||
|---|---|---|---|---|---|---|
| maximum diameter | 8.6 | 92.7 | ||||
| diameter at ends | 8.2 | 63.7 | ||||
| overall length | 92.3 | 717.2 | ||||
| length of "covering" | 76.4 | 593.6 | ||||
| length of "tail" | 3.0 | 23.3 | ||||
| length of shoulder | 2.8 | 21.8 | ||||
| length of nose | 10.2 | 79.3 | ||||
| diameter at shoulder | 6.4 | 49.7 | ||||
| diameter at tip | 2.9 | 22.5 | ||||
For simplicity's sake, I decided to just use the body tube thickness to represent the paper thickness (it's a little less thick than the construction paper would but should still create the right effect). So, the tail and nose cone would be designed to fit inside the body tube. These require custom turned or molded parts. (See the Adobe Acrobat drawings.)
Obviously, Crayons don't have fins so I decided to make my fins out of clear acrylic plastic. Acrylic is stiff, perfectly clear, break resistant, and easy to work. Obviously, the fins aren't completely invisible, but they all but disappear in flight. A local Tap Plastics store cut out the fins and finished them nicely for me so the edges are transparent and smooth.
 |
I didn't have a way to turn the noses and tails
(Balsa Machining Services doesn't do fully custom parts).
However, Jim Amos of Missile Works was very helpful and produced the parts for me exactly to my specifications, even using two different kinds of wood to help me get the right weight distribution! If you need truly custom parts, check out Missile Works (they also sell kits and electronics). |
||
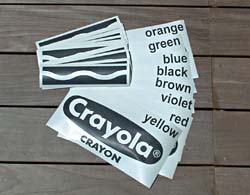 |
Originally, I planned to make the Crayon logo and text using decals, but the
decals you can make on a home printer don't work well on top of colored backgrounds.
Randy Brust had made vinyl decals for me for other projects and they'd turned out great, so I asked him to come up with the artwork and decals for the Crayon Pack. Randy even duplicated the Crayon logo for me in the correct scale. |
||
 |
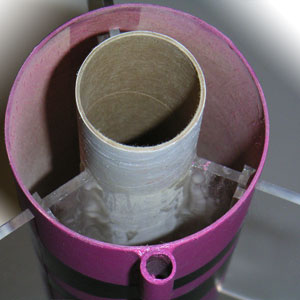
Here are all the major components of the rockets (aside from parachutes).
Pratt Hobbies small aramid bridle cord is used to attach the nose and parachute and is epoxied to the motor mount tube (tucked inside them in this picture). The noses have no lip, so I epoxied a short length of coupler inside the body tube, spaced down the correct amount and the noses slide into the body tubes and bottom out against the couplers. |
||
These rockets are pretty simple, but multiplying all steps by eight makes things take a lot longer!
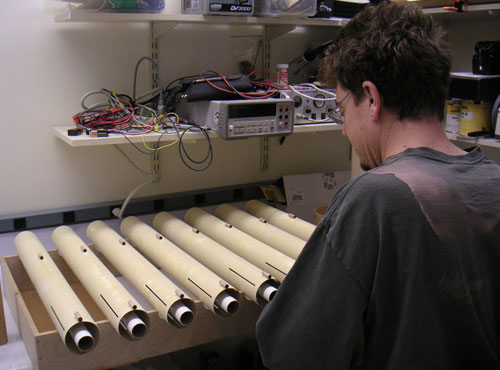
Above you can see me working on the rack of rockets. For some reason, I didn't make any provision for launch guides initially (in 1998) so here I'm adding double ¼" launch lugs to each rocket.
Painting
These rockets need a lot of different colors, two each for the eight Crayon colors (except yellow). This is a lot of paint! I eventually decided to buy hobby shop spray paint cans to simplify things.
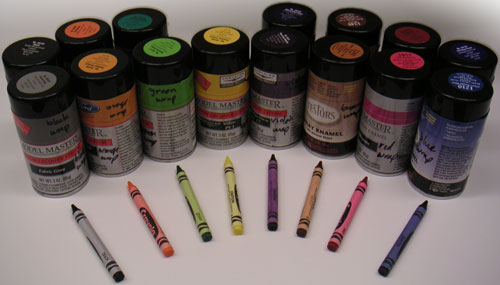
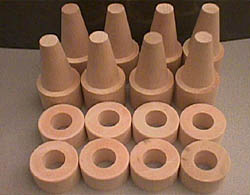
The first step was to seal and finish the noses and butts (the wax parts). First I painted the hardwood noses and balsa butts with epoxy and then sanded them. Next was a thick layer of primer and finally several coats of paint. (I wanted to get a rich, wet look to these parts.
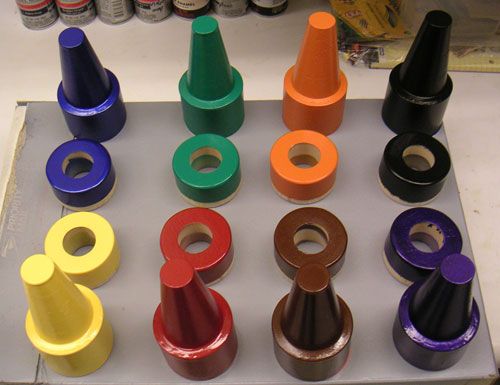
Above, you can see the result. I think they came out really nicely and those colors are absolutely stunning. (Maybe even a bit too bright, but they'll look good on the rockets.)
The next step was building the main rocket bodies. These were relatively simple since they came slotted from Loc/Precision. All I had to do at this point was cut them to length and install the MMT assemblies.
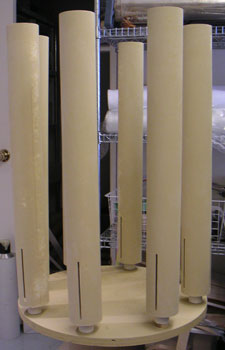
Next the tubes were primed and sanded. (Finishing was done before the rocket was assembled to make things simpler.) In the photo below left, you can see them ready for paint.
 |
 |
Of course, each tube was a different color so there was as much work finishing the tubes as finishing the turnings. I also wanted a more matte finish (to represent the construction paper crayon wrappings) so I painted directly on top of the initial sanding with 150 grit sandpaper.
The paint colors were too shiny and too solid for paper So, I misted on gray on the colored tubes and yellow on the gray tube. This helped, but I still wanted to remove some of the shinyness so I finished them off with a matte clear finish. (In the photo above right, I've misted on the gray, but haven't yet applied the matte clear.) These paints don't do a perfect job of representing paper, but they definitely have a different look than the ultra glossy turned parts.
The Fins
As mentioned above, I used clear acrylic fins to make these rockets stable. (The heavy noses might have been enough alone, but fins are always good for free rockets.) The problem with acrylic is that it doesn't bond well with epoxy.
I installed the fins in the usual through-the-wall manner and bonded them to the motor-mount tubes with epoxy.
However, I didn't feel secure enough about this joint so I also added acrylic strips to either side of the fin, just inside the airframe. These strips were bonded with special cement for acrylic and thus are much stronger. The strips should prevent the fins from pulling out of the slots just in case the epoxy bonds don't hold.
On the right, you can see the inside of the body tube after bonding the fins into place 1/8" square acrylic struts are bonded to the fins inside the body tube.
Here you can see the completed bodies (without the noses or butt pieces). The fins are on too; you can see them if you look closely.
The Box
I wanted the rockets to launch out of a box that looked like the coardboard box in which eight Crayons are packed. Of course, my crayons have fins and need launch rods so they can't really be packed in like actual Crayons.
In the diagram above, you can see the eight rockets laid out in two rows. From the front it will appear that they are in a single row, but there is plenty of space for the fins and the launch and guide rods.
 |
In the diagram above, the thick gray line at the top represents the front of the box,
which is done as a sign using vinyl graphics.
The sides and back of the "box" are missing to allow the exhaust gasses to escape.
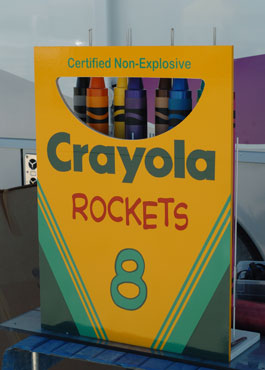
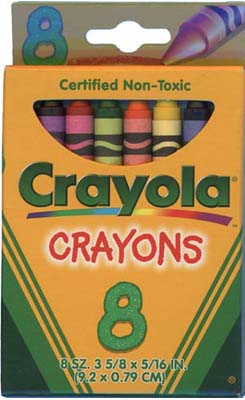
The front of the box is 25" wide 34" high. This is a little over scale, but will allow plenty of space to hide the launch hardware behind. To the left is the artwork for the front of the box. Note that the half-circle near the top is cut out to show the rockets behind (inside) the box, just like the real Crayon box. Compare this to the real Crayon box below. |
The front was made as a vinyl sign by my local FastSigns store. I use them to make vinyl decals for many of my rockets, but this is the first time I actually made a sign!
The bottom was attached to a larger piece of clear acrylic, which would be staked down to the playa. The front (the sign) was then epoxied along the bottom and reinforced with angle brackets at both sides.
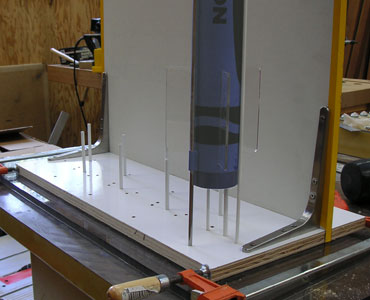 |
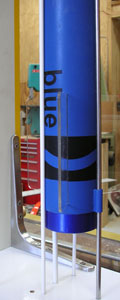 |
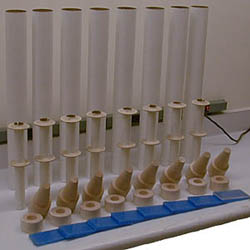
In the pictures above, you can see the back of the box. On the left the two pieces are shown attached (you can see the clamps). On the right is a close-up of one rocket and its launch rod (stainless steel) and guide rods (fiberglass).
The two guide rods, along with the launch rod, cradle each rocket like a tower and prevent the rockets from bumping into one another. A third fiberglass rod provides a stand-off from from the bottom of the box to place the rockets at the right height and provide space for the igniters.
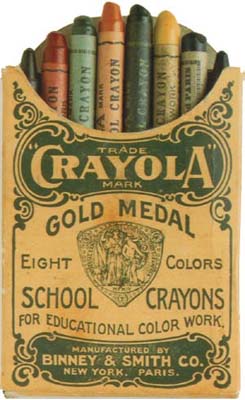
Crayons®
Binney & Smith, the makers of Crayola(TM) products, have a web site. I also wrote to them for a promotional pack and they sent me a nice folder of stuff including a large picture of the first pack of Crayons made (1903). Compare them to the current pack of eight (1998):
 |
 |
The Post Office also got into the act with a commemorative stamp as part of their "20th Century" series. See the first decade set: "1900s".