Crayon Bank
Many people have taken a look at a Crayon® bank in a toy store and thought "that looks like a rocket." Indeed it does, and in late 2014 I decided to make my own, and even made a video about turning a bank into a rocket (running time 10m).
The Pictures
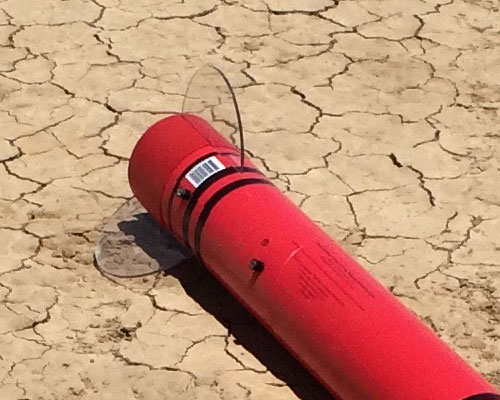
Here's the standard backyard picture of the rocket shortly after completion in March 2015.
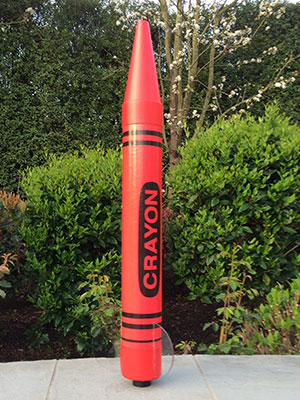
The polycarbonate fins don't completely disappear, but I do think they are a lot less obvious than other materials.
The first flights were at ROC-stock on June 13, 2015. I wanted to try first a slow motor and then a higher-thrust motor, so I brought an AeroTech H45W and an I140W and flew both.
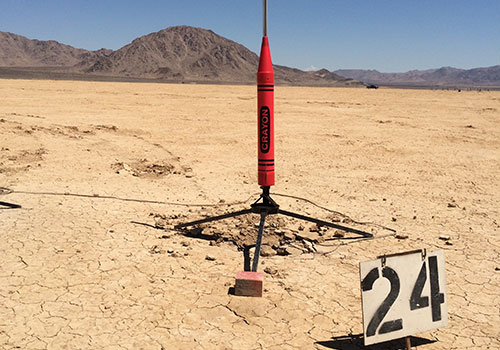
Above is the first time on the pad, ready to fly on the H45W.
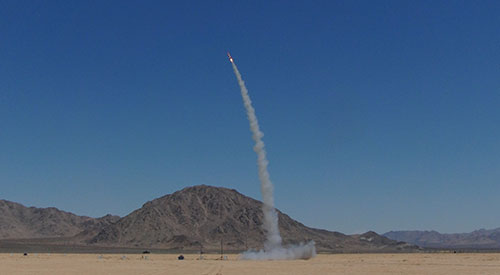
The rocket was a bit heavy for this motor, so the trajectory was off towards the west.
Even with a slightly late ejection due to the curved trajectory, the rocket was recovered intact. Flight altitude on the H45W was 1443' (440m).
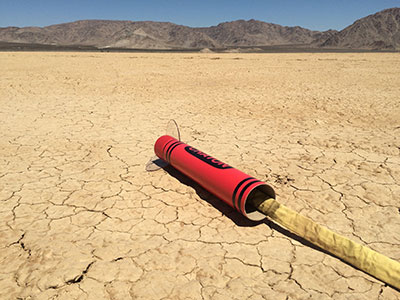
The second flight on the I140W was much straighter and reached 2177' (664m). The parachute was tangled and didn't fully inflate, but even so the rocket landed with the fins intact.

The soft paper tube is clearly not going to survive many flights (or being dragged across the play even once), but the polycarbonate fins are not the weak link and so I declare them a success.
The Design
There are several different versions of the bank. I bought mine on Amazon based on reviews, but it ended up being fulfilled by Toys R Us®, so it's also available in stores. See the Red Giant Crayon Bank on their site. It is manufactured by Fantazia, UPC 34764-00200.
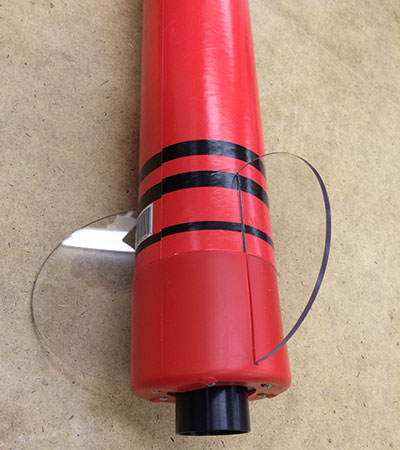
I wanted to use transparent fins so that it looks like the original bank on the pad. The problem with plastic is that it doesn't bond well with epoxy, so it's necessary to build a frame to which they can be mechanically fastened.
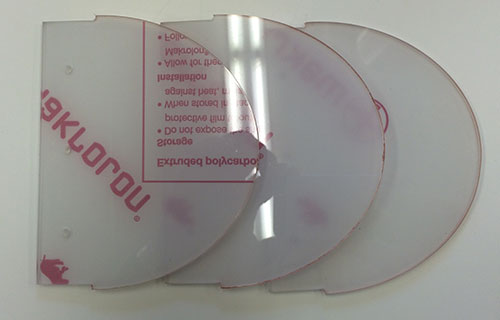
When making plastic fins, be sure to use polycarbonate because it is shatter resistant. Polycarbonate is sold under several brand names, the two I've come across are Lexan™ and Makrolon™.
Plastic sheet can be cut with woodworking tools, but be sure to use fine-toothed blades. Sand the edges for a smooth finish using 220-800 grit sandpaper and finish with jeweler's rouge on a buffing wheel to make them perfect.
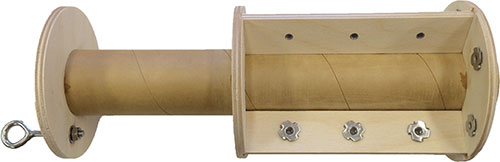
Plastic doesn't bond well with epoxy, so I needed to use mechanical fasteners to attach the fins to the fin can. That meant building a more complex aft end than usual, with plates running alongside the fin roots as you can see in the picture above.
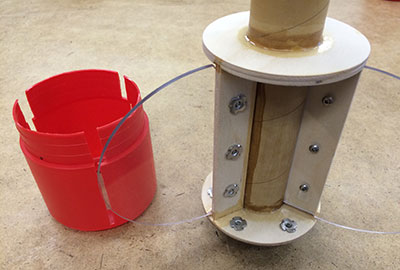
Above, the fins are mounted to the frame, sitting next to the slotted butt piece of the crayon bank. Below, the completed aft end of the rocket.
The rest of the rocket construction was straight-forward, but be sure to watch the video at the top for details and additional tips. And see my Plastic Fins video for more info on those.
As mentioned in the video, I decided to add an electronics bay. For more information on wiring and details on this electronics bay, see my Basic Wiring video.